Monday, October 29, 2012

Halloween Costume Series: Captain America!

Hey everyone here with my last halloween tutorial for the year, and this one is who I will be being for halloween. Captain America! Hope you all enjoy.


1. Start with a clean face and apple your foundation, concealer and powder.


2. Add a rosy pink blush to the apples of your cheeks to give them a nice I was just fighting villains flush.


3. Prime your eye and apply a sliver shadow to your lid.


4. Apply a light blue color onto the outer part of your lid.


5. Blend an even lighter blue into your crease.


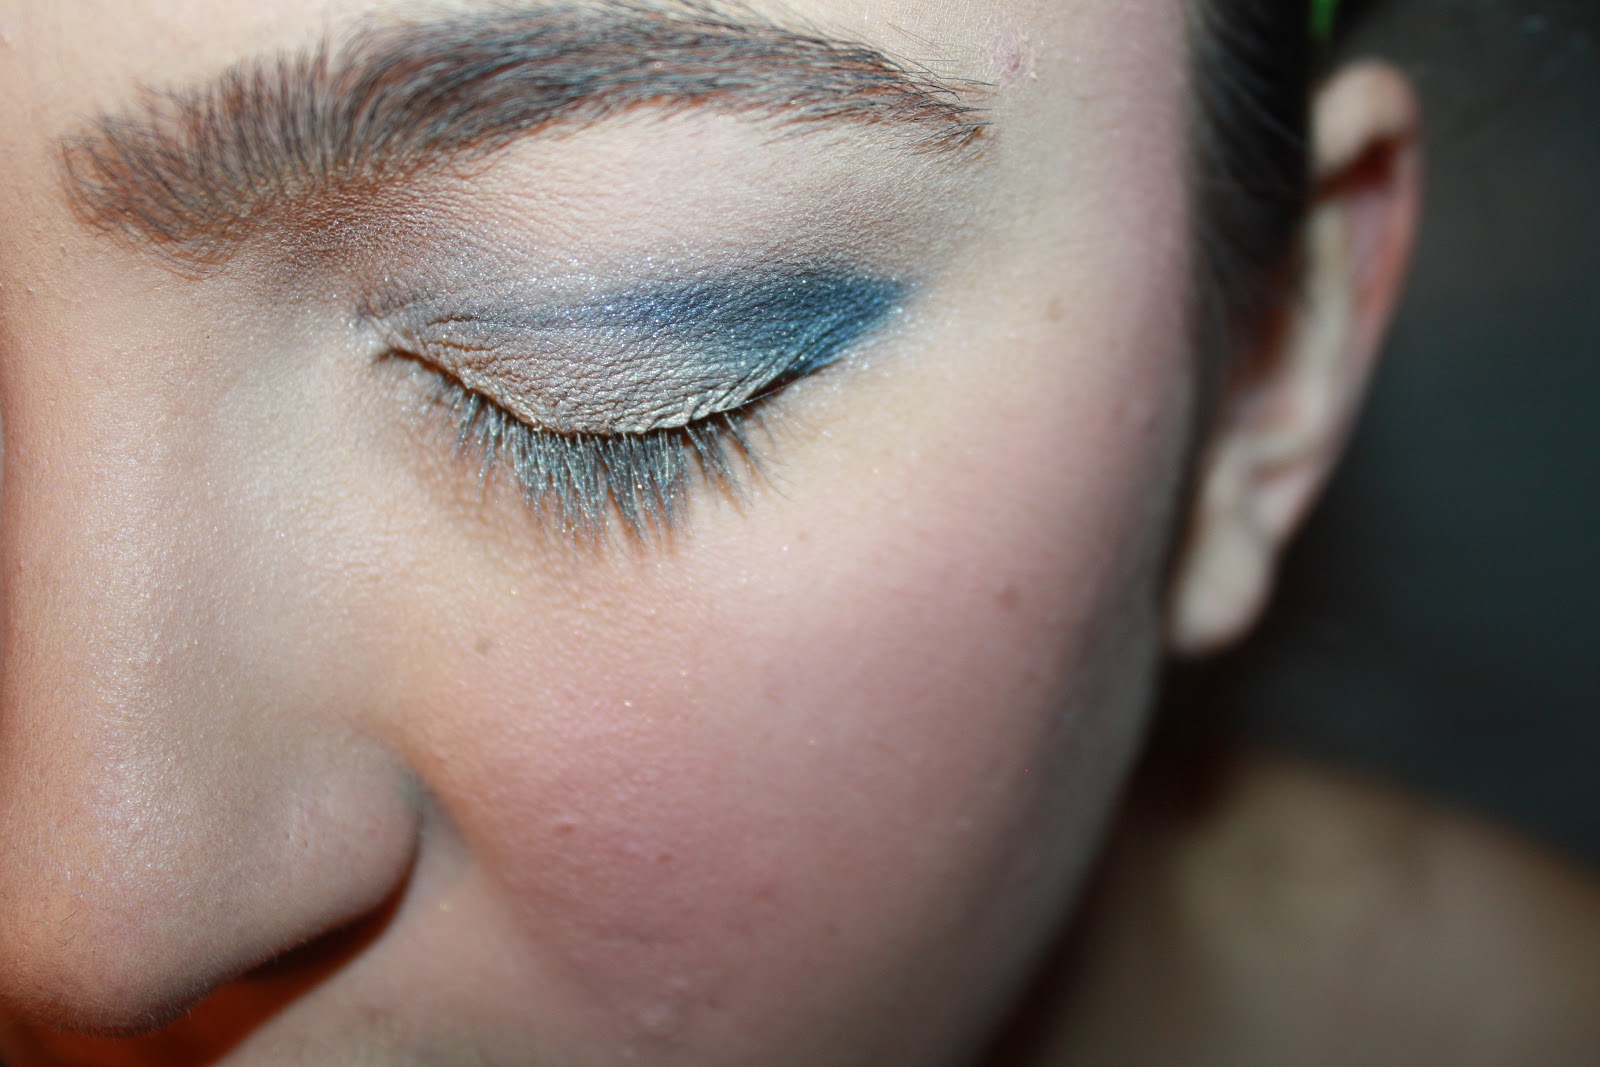
6. Then take a dark navy color and apply this to your outer v and into your crease don't worry about blending yet!


7. Apply an even darker navy color to your outer v to define it more and then blend the crease but leave the outer v a little more sharp and defined.


8. Take that same navy color and trace along your upper lash line with it this is going to be your eyeliner.


9. Add a white shimmery shadow to your brow bone and inner corners.

     11. Add a black mascara to your lashes it doesn't need to be intense due to our already shimmery eye look.


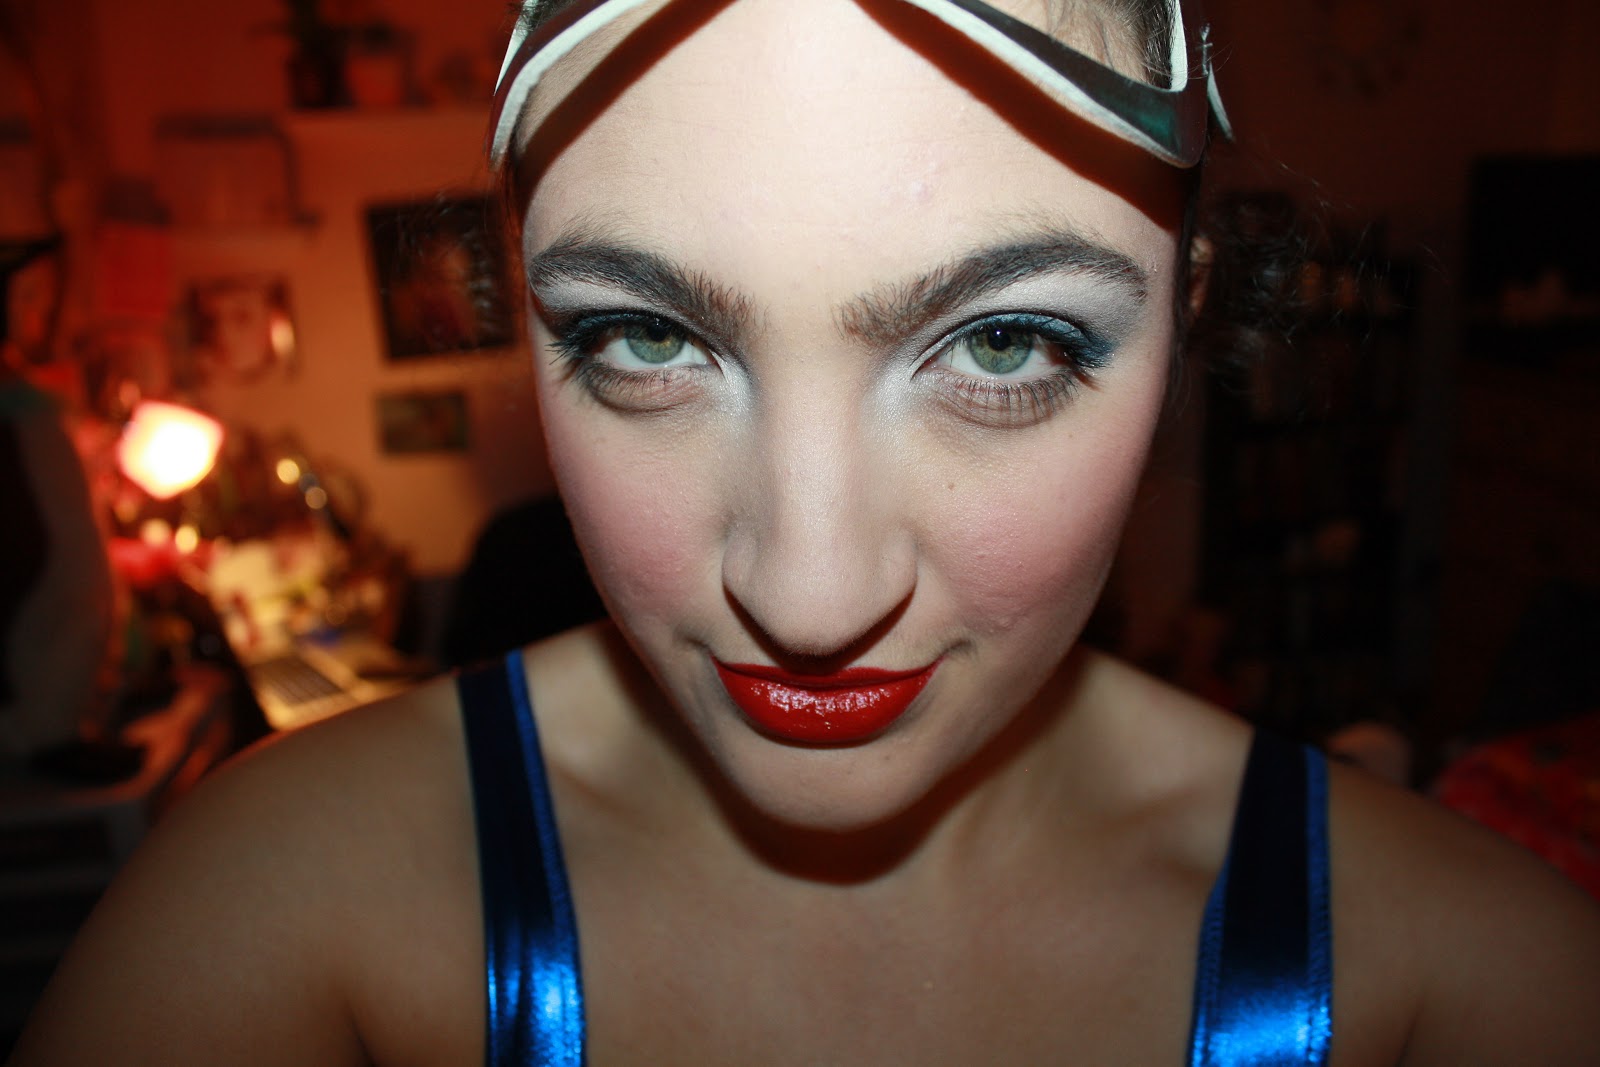
12. Add a red lip stick and shiny gloss and your ready to go!

Here is your finished look!


Hope your all having a happy october and Halloween!


Thursday, October 25, 2012

Halloween Costume Series: Walking Dead Style Zombie


Hey everyone, this is my Walking Dead Style Zombie tutorial. It includes both a face wound and a neck wound step by step tutorial. Hope you all enjoy this and if you try it out send me a picture of how it turned out!

The Face:

1. First you want to pale out any skin that is showing out of your costume, I used a concealer and foundation mix that are three shades lighter then my actual skin tone. 
2. You want to put a generous amount of pressed powder on top this can be either lighter then your skin tone or translucent this will help the contouring not stick to the foundation.


3. You want to take a matte dark grey or black eyeshadow and fill in your contours. Including your temples, the hollows of your cheeks, the sides of your nose and the sides of your chin.

 
4. Then you want to use the same color shadow and follow the line of your eye socket with it using a fluffy crease brush. You can add some blue and red matte shadow to it to give it a more bruised effect.

5. Then you want to take a waterproof eyelash glue and spread a liberal amount in the area you want the wound to be. 
6. After you have your wounds preferred shape you want to take a tissue and separate the two layers of it like most tissues have. 
7. Then using the same foundation you used for your face you want to cover the tissue.
8. Finish off by once again apply a translucent powder. 

9. After it dries a little use a pair of tweezers and feel back some of the tissue glue mix to create the hole  for your bullet wound. 

10. Fill in the area you cleared with a dark purple shadow.
11. Using a matte black shadow you want to use a pencil brush and apply it to the rim of the wound. Don't be scared to smudge some onto the scar tissue around the wound!

12. Using a moss green shadow add some color to the scar tissue around the wound and to the normal skin near the wound. You can also add some blue and grey to the scar tissue for a bruised rotten look.

Neck Wound:

1. Choose an area where you want your zombie bite wound to be and apply the eyelash glue to the shape you want to wound to be.
2. Then apply a layer of the tissue to the glue and cover with foundation and a translucent powder.

3. After your wound has dried you want to take your tweezers and create a wound the size of a bite mark would be.

4. Using a matte dark grey or black shadow follow the contours of your neck to give it a sunken look don't forget to blend blend blend!


5. Using the same colors as you used on the face add color to the wound. I also took a purple shadow and created bruising on my shoulder as if someone had gripped me hard. I added some black over it to make it more intense.


6. Now add the fake blood to your wounds, have to pool in the wounds to make it more realistic. 
7. I also took some of the blood on my finger tips and ran it over the bruising to make it look like the nails scratched as you were trying to get away. 
8. Lastly smudge some fake blood onto your mouth to give that I just ate someone effect!


This will be your final look hope you all enjoyed!


Thursday, October 18, 2012

Influensters Beauty Blogger VoxBox!


Hey everyone today I recieved this Beauty Blogger VoxBox from Influenster, the products shown below is what was included in the box. I will give the description that the included on the card they gave me for each product, I will try everything out and post a review soon! Hope everyones doing great. 


Kiss Ever Pro Lashes Starter Kit: Bring the salon home with this eyelash starter kit, it includes eyelashes, adhesive and applicator. The latex-free glue has a 24 hour hold for lashes you can bat all day and night! 
$5.99 Drugstores


Goody Simple Styles Spin Pin: The Goody Spin Pins give you the ability to achieve three different updo styles. Just twirl up your hair and spin in the two pins for a perfect updo! 
$7.29 Drugstores 


Not your Mothers Kinky Moves Curl Defining Hair Cream: Infused with grape seed & jasmine to encourage curls and eliminate frizz and fly aways.
$6.00 for 4oz. Drugstores


New York Color Individual Eyes Custom Compact: This compact comes with everything you need to create the perfect eye look. It includes primer, illuminator, applicator and four shadows especially created to enhance your eyes. 
$4.99 Drugstores


EBOOST Daily Health Booster: This EBOOST will boost your mood, focus and immunity with all natural ingredients and doesn't give you the crash that comes along with it! Take it as a shot or mix it with water, it comes in four different flavors.
$28.00-$39.00 Click Here


Bath & Body Works Mini Candle: A mini candle with a big scent refresh your house with their wide selection of scents!
$3.50 Click Here


VitaBath Fragrance Mist: Revitalizing and light weight scent thats formula is infused with conditioning vitamins and an antioxidant blend to keep your skin happy and refreshed!
$9.99 Click Here


[Disclaimer: I am not being paid or sponsered to write this post]

Monday, October 15, 2012

I ♥ Fall Tag!


[image from google]

Hey everyone I am doing the I Heart Fall Tag hope you enjoy and I tag all of you to do this!


1. Favorite Fall lip product?
   My favorite fall lip product would have to be my EOS lip balms they keep my lips super moisturized during the dry weather.

2. Favorite Fall Nail Polish?
   My favorite fall nail polish is Vintage Vamp by MAC its a beautiful deep red color that gives you that real blood red feel.


3. Favorite Starbucks Fall Drink?
   This one is a hard one for me but I would have to say Spiced 
Pumpkin Latte its like your literally drinking fall in a cup.


4. Favorite Fall Candle?
   Salted Caramel by Bath and Body Works is the perfect warm and yummy scent for fall.


5. Favorite Fall Scarf or accessory?
   Hats are defiantly are my favorite fall accessory!


6. Haunted house, haunted hay ride, or haunted corn maze?
   None of the above I love horror movies and all of that but I hate when things jump out at me.


7. Favorite Halloween movie?
   My favorite movie to watch durring the spooky season is definatly John Carpenters Halloween its just the perfect amount of everything spooky. Plus who doesn't jump at the sight of Michael Myers.


8. Favorite candy to eat on Halloween?
  Kit Kat Bars!


9. What are you dressing up as for Halloween?
   Captain America's Daughter!


10. What is your Favorite thing about Fall?
     The gorgeous weather, not to hot not to cold just right and the wonderful color of the changing leaves!


Monday, October 8, 2012

Halloween Costume Series: Vampire


Hey everyone this is the first tutorial in my Halloween series, inspired by the dark shadows movie and the vampires in it .I decided to do a more subtle look than they did, but it still has that great vampire feel. Hope you enjoy


1. Start with a clean face thats properly moisturized and primed. Then apply a foundation three shades lighter then your skin and apply a pressed powder over top. 

2. Using a fluffy crease brush apply a mixture of taupe and red shadows underneath your eyes and in between your inner corner and nose but make sure they are matte! This will give the look that you haven't slept in centuries.

3. Prime your eye and apply a silver eyeshadow to your lid.

4. Apply a dark grey into the crease and blend it thoroughly. 

5. Then apply a black shimmery shadow to your outer v and blend a little its okay for this look to seem harsh.

6. Next take a redish bronze eyeshadow and apply it with a pencil brush to your water line and under your lower lash line.

7. Apply a light silver color to your inner corner and onto your brow bone.

8. Tightline your upper lash line with a black eyeliner pencil.

9.Apply a black cream eyeliner to your upper lashline and wing it out a little.


10. Apply your favorite false lashes and blend the fake lashes with your real ones with black mascara.

11. Line your lips with a red lip liner and apply a dark red lipstick. I finished the lips off with just a touch of black lip gloss.

12. Lastly add your fake blood to your mouth and your ready to go!


Hope you all enjoy this look and another will be coming soon, have a great fall everyone!